


5 tips to create the best Before & After images for Brow treatments
written byRafaela Tessari
In This Article
Who is Anastasia Biskopchuk?
If you don't know her yet, Anastasia Biskopchuk is a super creative brow artist and content creator from Ukraine, known for her viral videos and innovative approach. She’s making her mark by starting her own brand and collaborating with top brow brands. Her work, including our Liquid Dye - Beyond Brows launch, has set new industry standards, making her a true trendsetter in the beauty world! You can watch three episodes with Anastasia about new beauty standards in our Show Character series.

Why sharing before & after photos?
We bet your explore page on Instagram is full of before-and-after photos. And there’s a good reason for that! These images are not just popular—they’re incredibly effective.
Before-and-after photos do more than just show your work, they tell a story that words can’t capture. When you share these photos, you’re giving potential clients a clear picture of what you can do for them. Instead of just hearing about your skills, they can see the results for themselves, which builds trust and helps clients feel confident that they’ll get the brows they’ve been dreaming of.
On social media, before-and-after photos are especially powerful. They grab attention, spark curiosity, and often get reshared, which can help you reach even more people. And that means what? More clients!
5 tips for the best before & after photos
Now that you know why before-and-after photos are so important, it’s time to make sure you’re creating the best ones possible. To help you nail the perfect shot every time, we’ve gathered the top 5 tips from brow expert Anastasia Biskopchuk. Let’s dive in!
1. Lighting
Lighting can make or break your before-and-after photos. While many people rely on a simple ring light, there’s much more to consider if you want to capture the true beauty of your brow transformations. Here’s how to take your lighting game to the next level.
Ring light is good, but…
A ring light is a popular choice for many brow artists, and it’s easy to see why. It’s convenient, easy to use, usually pretty cheap, and gives a soft, even light. However, Anastasia has a different take on it:
"Some masters use a ring lamp instead of a video light, but I personally do not like taking pictures with it."
While a ring light can work wonders, it often casts shadows under the eyes, emphasizes dark circles, and can make skin tones look uneven or yellowish. It doesn’t always highlight the natural glow of the skin, which is crucial for showing off your work at its best.
The power of LED video lights
For a truly professional result, consider using an LED video light instead of relying solely on a ring light. Anastasia is using Yongnuo YN900 LED light, which features 900 diodes and a stable color temperature of 5000-5500K—similar to natural daylight. She says:
"It makes the picture alive, the skin smooth and glossy."
This light allows you to capture details with incredible clarity, showing the true colors and texture of the brows and skin! No wonder why Anastasia images always feel super crisp.

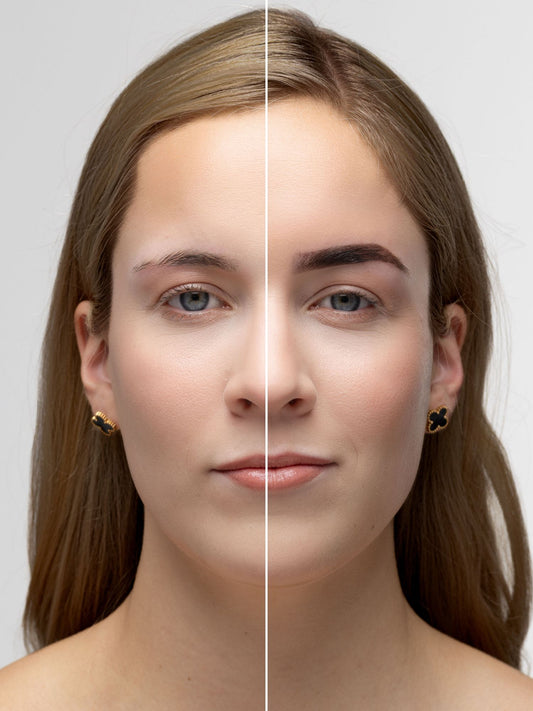
See for yourself - the skin is so glossy!
Light placement
Placement of your light is just as crucial as the type of light you use. Anastasia shares her technique:
"In beauty photography, I often set the video light just above the camera so that it illuminates both sides of the face equally and does not create unnecessary shadows."
Anastasia recommends using the LED video light as your key light (the main source of light) and supplementing it with a weaker fill light, such as a room light or a reflector. This setup softens shadows and balances the overall lighting, making your photos look professional and polished.
2. Angles
Let’s explore the 3 most effective angles and how to use them to your advantage.
- The Below Angle: A popular choice
One of the most popular angles in beauty photography is from below. This angle is widely used because it tends to show the eyebrows and makeup in the most flattering light. Big plus is that with this angle its possible to show the brow in full allure. Also for closeups of the brow, this angle usually works best.
- Eye Level: Classic but can be boring
Taking photos at eye level is a safe option, and it’s often the go-to for many brow artists. It’s familiar, easy, and provides a clear, direct view of the brows. But if all your shots are at eye level, your photos might not stand out as much. To add some variety and interest, consider mixing in different angles that offer a fresh perspective!
- Above Level: Adding depth
Shooting from above can bring a new dimension to your photos, making them more dynamic and interesting. The above angle can create a unique and engaging image that draws attention. And that’s what we want!
Anastasia’s Tip: “When photographing an object from above, it’s better to move away a little and use a slight zoom to avoid distorting the proportions of what you’re capturing.”
3. Camera set up
Now that you've mastered the angles, let’s talk about how to set up your camera for the best results.
Smartphones over professional cameras
In the world of social media, people love content that feels real and immediate. That’s why photos and videos taken with a smartphone often perform better than those shot with a professional camera. Phone content is relatable, and with the quality of today’s smartphone cameras, you can capture every detail of your brow artistry without needing expensive equipment. That's what you wanted to hear, right?
Camera settings of your phone
When setting up your phone camera, it’s important to choose settings that will give you the best quality without compromising your images. Anastasia recommends selecting the “Most Compatible” setting instead of “High Efficiency.” While “High Efficiency” might save some storage space, it can sometimes make your brow photos look grainy, especially in detailed close-ups.
For videos, make sure to set your camera to record in 1080p HD at 60 frames per second (fps). This will give you smooth, crisp footage that perfectly showcases your work. As Anastasia advises:
"If I plan to post a video on Instagram, I choose 1080p. If you upload a video to Instagram in 4K, then Instagram will compress it itself so that it takes up less space."
Exposure: Dark photos look better
Another tip! When taking photos, consider slightly darkening the image:
"If you make the photo a little darker when taking it, it will look better, more voluminous. This is especially relevant for subject photos." says Anastasia.
This subtle adjustment can add depth and richness to your images, making your brow work appear even more defined.

Use the grid: Master the rule of thirds
To take your photos and videos to the next level, turn on the grid feature on your phone. This simple tool helps you apply the rule of thirds, a key principle in photography that divides your frame into nine equal parts. By aligning your subject along these lines or at their intersections, you can create balanced, well-composed images that draw the eye exactly where you want it.
4. Posing
Posing plays a crucial role in capturing the perfect before-and-after shots. The right pose can highlight your work and make the photos feel more natural and engaging. Here’s how to guide your clients to get the best results:
Give your clients something to interact with
Sometimes, holding a pose can feel awkward for clients, especially if they’re not used to being in front of the camera. To help them feel more comfortable, Anastasia recommends giving them something to interact with—a mirror, a hand gesture, or even a prop. This interaction not only makes them feel more at ease b es ut also adds a dynamic element to the photo!
Zoom in for shy clients
Not everyone loves having their photo taken, and that’s okay. For clients who feel shy or uncomfortable, it’s best to focus on the brows and avoid capturing their full face. Images where the client appears hesitant or uncomfortable don’t always turn out the best. Confident clients naturally pose better, so don’t push anyone to pose if they’re not feeling it! Created beautiful brows, but your client is not really photogenic? Than a zoomed in version is your lifesaver to still capture the beauty you created.
Confident clients? Time to experiment
When you have a confident client who enjoys being in front of the camera, this is your chance to get creative! Experiment with different poses and angles to see what best showcases your brow work. Encourage them to try various expressions, head tilts, or even more dramatic poses. Confident clients are often more willing to try something new and stay a little longer, which can lead to striking and unique photos.
5. Editing
After you’ve captured the perfect shot, the next step is editing. While it’s important to showcase your work authentically, a little editing can go a long way in making your photos look polished and professional.
Don’t underestimate the power of editing
Editing is a crucial step in the photo process that should never be overlooked. It’s your opportunity to refine the image and make sure that the focus remains on your beautiful brow work.
Keep it simple
While it can be tempting to use filters and effects, it’s best to keep things simple. Adjusting the exposure, contrast, and sharpness can make your photos pop without altering the natural look of your work. The goal is to enhance the image so that your brow artistry stands out, not to create an overly edited look that distracts from it. Remember - less is more!
Use editing tools
Programs like Photoshop or Lightroom are excellent for making subtle adjustments that can elevate your photos. Use these tools to hide small imperfections such as pimples or red spots that might distract from the brows. However, it’s important to avoid changing the actual appearance of your brow work—clients should see the same results in person as they do in your photos.

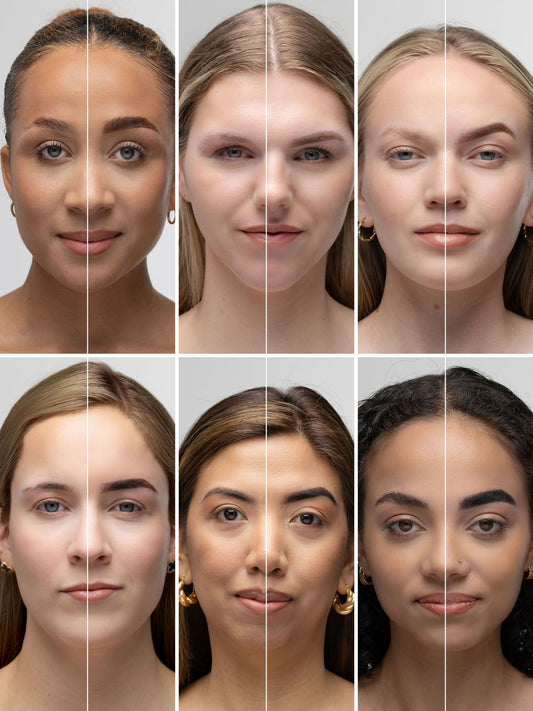
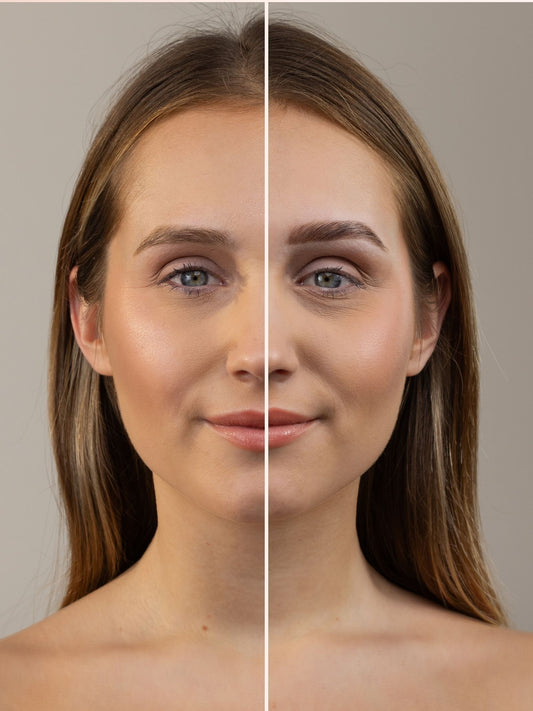
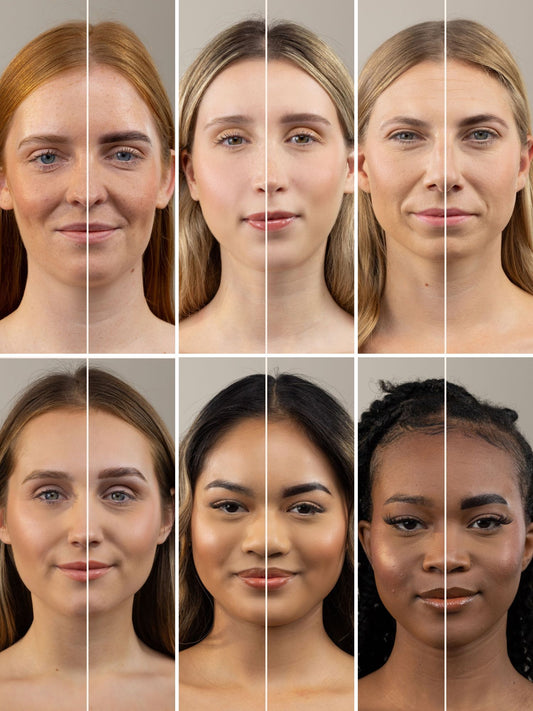
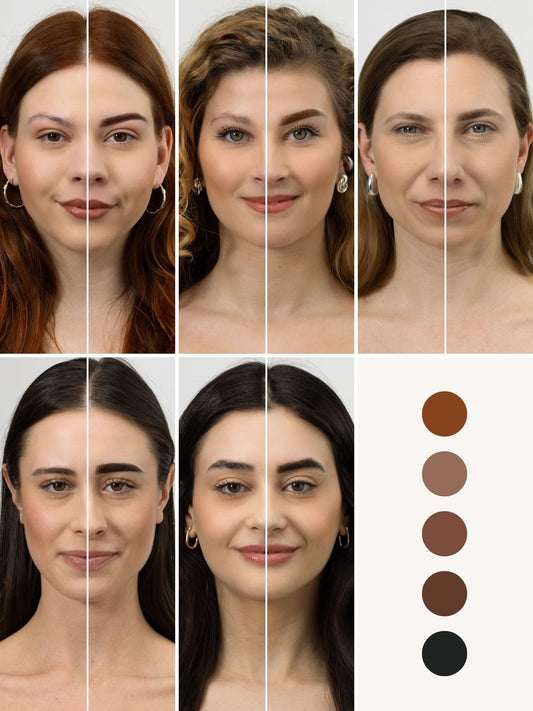
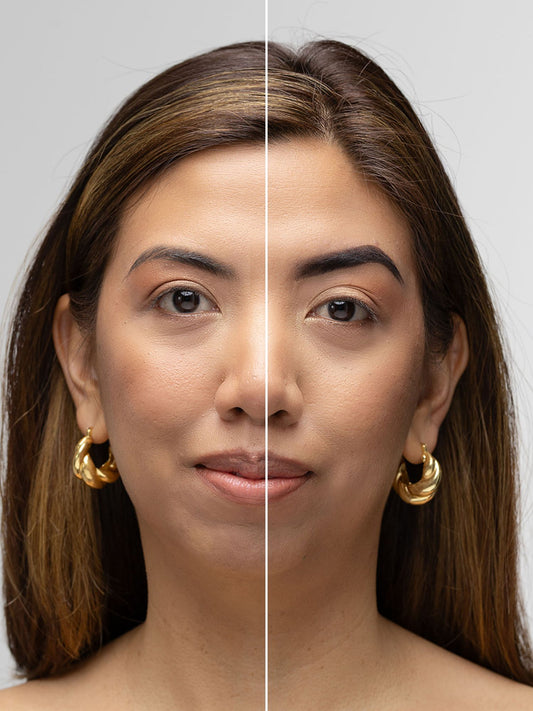
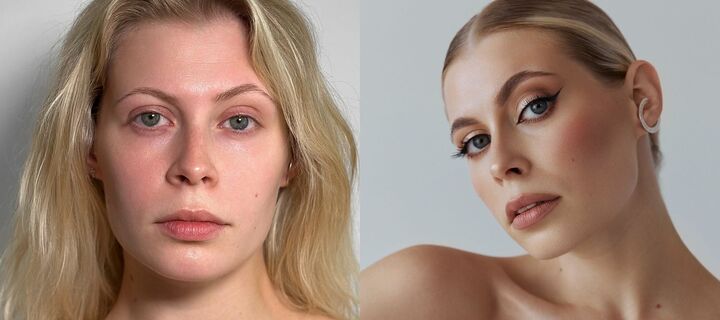
A perfect example of a before-and-after photo: In this shot, you can clearly see how the right lighting setup, thoughtful editing, different angle and model posing can truly change the final result!
Take before & after photos and go viral
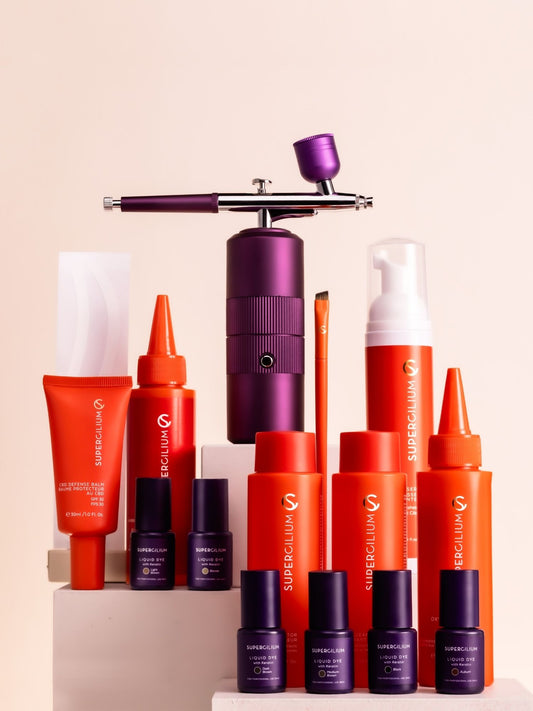
With these tips you’re ready to create stunning before-and-after brow photos that not only showcase your skills, but also have the potential to go viral. And here’s an extra bonus: When you purchase our Liquid Dye course, you’ll gain access to a comprehensive guide on how to create viral content, featuring more exclusive tips and tricks from Anastasia herself! This “Content Creation Tips and Tricks” guide is designed to help you take your brow game—and your social media presence—to the next level.
So, keep experimenting, keep learning, and watch your brow game—and your following—grow. For more brow inspiration and to see how the pros do it, follow Anastasia @anastasia.biskopchuk and our blog section for more tips!